Today I will explain howto setup the Mumble Client under Windows, Mumble is an open source voice communicator program which is an alternative for TeamSpeak and Ventrilo.
First of, go to the Mumble website at http://mumble.sourceforge.net and download the client, install it and open it.
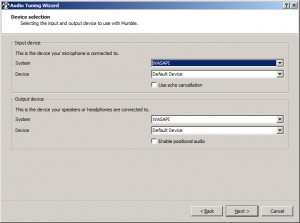
The first time you run Mumble you will be asked if it should run the Audio Wizard, press Yes to that and press Next to the introduction, now your at the “Device selection” section:
Update: I later found out that WASAPI is a special driver in Vista, if your running Vista, please use the WASAPI driver, it performs better then DirectSound.
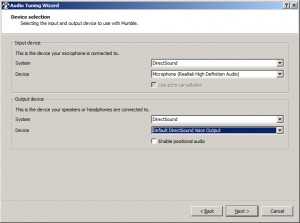
Mumble will by default listen to the “WASAPI” device driver, I dont know what the “WASAPI” driver is, but I like using DirectSound instead (Part of DirectX, I thing), so I changed both input and output to “DirectSound”, and selected my sources for my system, so I will get this:
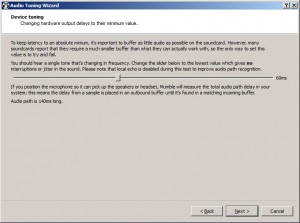
After setting up input and output, press next. You will now be asked to setup the delay / buffer it should use before sending it to the server, I have set mine to 60ms, if you have an external soundcard, you could probaly set this to something lower, like 20 or 40ms. Press Next.
You are now being asked to setup the “Volume tuning”, I did not touch this, I did just press Next here, since my setup worked out of the box, press next.
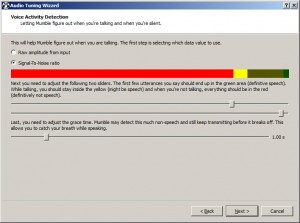
The “Voice Activity Detection” section, well, I just skipped that, since I hate when people use “Voice Activity” to speak, so skip this step, and set a Push-To-Talk button instead. Press next and Finish.
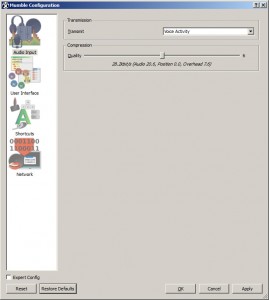
Mumble is now setup, but with the default settings like “Voice Activity”, this is annoying, so lets setup it up to Push-to-talk instead, select “Settings” from the “Configuration” menu, and you will get:
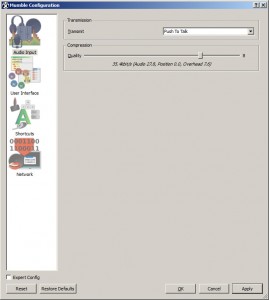
Change Transmit to “Push To Talk”. The default Compression should be good for must people, but if you have upload to spare, you could change the quality to something higher, in my case I’ll set it to 8.
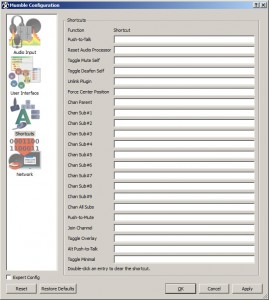
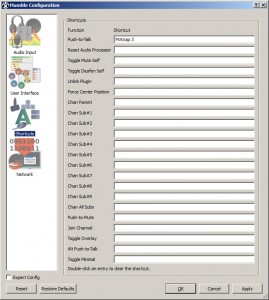
Now we need the set a push-to-talk button, go ahead and click on “Shortcuts”, you will now get something like this:
It’s rather simple to set a Push-to-Talk key, just click on the white space left to the Push-to-Talk label, and push the button on your keyboard / mouse you want to push, in my case it was Mouse 3.
Mumble is now ready to go !
Notes: Mumble seemes to forget the “Push-to-Talk” setting under Audio Input, if you forget to press Apply settings when you change it.

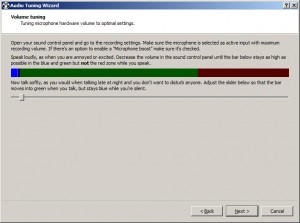
“You are now being asked to setup the “Volume tuning”, I did not touch this, I did just press Next here, since my setup worked out of the box, press next.”
Nice guide man, very helpful…
I can’t seem to find the answer to my problem. My guys use ventrilo as do most gamers so, I keep ventrilo up while I either double vent or teamspeak as secondary, etc. So, I want my push-to-talk key different in the second VOIP so I am not talking in both voip’s. When I loaded up Mumble all was well until I wanted to change the push-to-talk key. Now I can’t use mumble because the preferences only has ’shortcuts/push-to-talk’ which has zero options to set a key bind. After several reinstalls, I am still stuck with the bad info so I think it is this ‘certificate’ mumble makes that is storing bad information. All I can say is this” Mohawk, Teamspeak, and Ventrilo are simple and logical to setup. Mumble is becoming a huge waste of time to group with people.
I found the answer! Mumble Configuration/Shortcuts/ Then under Functions something is auto selected. Right click it and change it to Push-to-Talk. Then right click the empty white space with no icon or nothing under shortcut for key bind (this is what through me off, empty nothing white space). Mumble should make function, data, and Shortcut a physical icon or button, or drop-down menu so it doesn’t look like an information menu.